Category Archives: Just For Fun

DIY Baby Sled From Baby Bath Tub

Untitled

Untitled

You can’t get any easier than this little DIY.  Really, this is just a thinly disguised excuse to share some pictures of my little cutie eating snow.  But who doesn’t like to see cute baby pictures, right?

Untitled

All you need for this super simple DIY project is a baby bath tub, an electric drill, and some rope.  The hard plastic is very easy to drill.  Once you have your holes, all you need to do is thread the rope and POW you’ve got yourself a tow-worthy sled (don’t get your hopes up about any hill action with this sled I’m afraid).

Untitled

I will say that this sled works best on the sidewalk with just a thin layer of snow, but the thicker stuff is fun too, it just kept tipping over for us (much to the delight of our nearly 18-month-old daughter).

Untitled

Untitled

To keep up will all things zween (DIY projects, new plarn creations, baby pictures) like the zween facebook page!

Leave a comment

Filed under Just For Fun, Upcycled

Crafting family fun; DIY cardboard box maze

Untitled

If you are a parent, but even if you’re not, you’ve probably heard the age-old adage that a child will enjoy playing with the box that a toy comes in more than the toy itself.

Today I’d like to share some photos of a little family craft project (well, not so little actually) that we started one rainy, dreary morning this week.  It’s a giant maze made from recycled cardboard boxes that encompasses our entire dining room (I knew there was a reason we’ve been dragging our feet finding a dining room table).

Untitled

Untitled

All you need is several cardboard boxes (ours were complements of Trader Joe’s, thanks to my husband, our insider connection) and some packing tape or even duct tape.  Just fit the boxes together in whatever configuration you like and tape them together where needed to keep the structure stable.

Untitled

Virginia is just a couple of weeks from her first birthday now (!!!!) and isn’t yet walking.  She LOVES crawling around this maze.  We’ve had it up for about four days now and it’s been good for HOURS of entertainment!  She just loves to chase momma around the maze and be chased herself!  Papa got in on the action too of course, but at over six feet tall, he had some maneuverability issues.  By the way, as an adult, army crawling through a cardboard maze is quite the workout!  Sometimes we mix it up and place rattles, balls, and other small toys around the maze for her to find, but mostly she’s content to crawl in and out, squealing in delight all the way.

Untitled-1

This is a great project for those days when you just can’t get out and I’m sure would work great with older kids as well.

If this post has inspired you to create your own box maze I’d love to hear about it!  Write about it in the comments below or on the zween facebook page.  Happy crafting!

Untitled

2 Comments

Filed under Home, Just For Fun, Upcycled

Pinspiration; Men’s Shirt to Apron Refashion

Untitled

Hi all!  Well, little Virginia is growing every day and will be 12 weeks old on Sunday!  I can’t believe it’s been 12 weeks already!  AHHH!!! (see how BIG she’s getting?!)

Untitled

As my maternity leave draws to a close I thought I’d tackle a quick and easy* project that I can wear to work at the Root Cafe where I am a barista.

I first came across the idea of refashioning a men’s button-down shirt  here on Pinterest.  Although I got the gist of the idea just from the picture, I found this tutorial on the Grow and Make website very helpful.

Need a new apron?  I definitely recommend taking on this project!

To keep up to date with all things Zween, please flow me on Facebook and Pinterest!

Untitled

This post has been added to the linky party make it, wear it Thursdays on the train to crazy, Make it Pretty Monday week 18 over on the dedicated house, Make Mondays Marvelous on C.R.A.F.T. and Made by you Mondays over on Skip to my Lou, so check them out for some linky fun!

3 Comments

Filed under Just For Fun, Upcycled

Custom, Practical, Crochet

I’m a pod cast junky.  There, I admit it.  I love to listen to them while I’m making stuff.  But lately I’ve been bummed out because my headphones are so uncomfortable to wear.  Unfortunately, I can’t wear ear buds at all, and trust me I’ve tried.  So I have to wear clunky head phones instead.

The problem I usually have with headphones are the cheep foam covers that fit around the ear pieces.  These are always the first thing to go on headphones.  In the case of this particular pair, the foam covers went years ago so I bought replacement covers at some big box store that ended up being way too big and ill-fitting.  But I used them for a long time, until finally this morning I had had enough and I made custom crochet covers for them.

This is not the first time I’ve fixed headphones in this way.  The first time I did it was in 2008.  We were barely into our Peace Corps service and still living with our host family.  Somehow the foam covers of the headphones that I brought from the US had completely disintegrated by month two of life in Morocco.  Sure I could have requested that a new pair be shipped to me in my next care package, or even bought some in Morocco, but instead I chose the DIY route and crocheted myself a new pair of covers.  To my delight they worked great!

About one year after later while we were in Rabat for our mid service medical exams, I noticed that one of my volunteer friends, Dan, was having the same problem with his headphones.  Of course I just happened to have some yarn and a crochet hook on me at the time (who travels without these things?), so while he wasn’t looking I quickly made him a home-made pair too.  To my surprise, he was still using them one year later when we finished our service in November, 2010!

So this is my third time making headphone covers.  They are really easy to make.  Mine are just made by crocheting single crochet in the round in the general shape of the headphones until they are the appropriate size (most headphones are not perfect circles, so you’ll want to use your specific pair as a guide and get your crochet cover to match up as closely as possible).  Then I crochet one or two rounds more without increasing and the final round is a double crochet/single chain pattern that you weave a piece of yarn into so as to synch the cover over the headphone.  Easy!

This is not a glamorous project, but it is practical.  There are a lot of instances where something minor brakes or wears out on something that we use often.  Though we are capable of figuring out a way of repairing or replacing the worn/broken component, we tend to take the easy way out and just throw it away and buy a new whats-it.

Do you have a story about a time you used your crochet skills (or sewing, or knitting, or crafting, or woodworking skills, etc) to bring something broken back to life?  I’d love to hear them!  Leave a comment below or on the zween facebook page.

Happy crafting!

Leave a comment

Filed under Just For Fun

I heart artichoke hat

Here’s a fun little project that I’ve been tackling the last few days.  The inspiration for this hat came this past Saturday from my table neighbor at the November Cleveland Craft Coalition Bazaar.  She had a beautiful scarf crocheted in a variegated fall color way using a crochet stitch that I had never seen before called the crocodile stitch.  Since I love learning new techniques,  I decided that I had to teach myself how to make this stitch.

The process of learning the technique was fairly easy with the internet.  All I had to do was google “crochet crocodile stitch” and I got tons of results.  I started with learning the basics from this video on YouTube.  After I learned the basics of the stitch I was ready to put it to use.

Though I think a scarf is a great application for this highly textured stitch, I wanted to try a hat, which is how I found this free crocodile stitch hat pattern.  What’s interesting about this pattern is that it’s worked from the bottom up, which is opposite from the way I am used to crocheting.  Along with becoming very familiar with the crocodile stitch by making this hat, I also needed to learn how to make a half double crochet foundation row, for which I used this YouTube video.  Unlike a regular chain stitch foundation row, the half double one allows for much more stretch.

As soon as I saw the pattern online I knew right away that I wanted to make my hat look like an artichoke.  I mean this stitch just screams ARTICHOKE to me!  Luckily, I had nearly an entire skein of Caron Simply Soft yarn in Dark Sage from the shamrock garland I made last March.

It was very easy to adapt the before-mentioned pattern to look more artichoke-like.  All I needed to do was create a stem on top to complete the look.  Easy!

Have you made something recently that utilizes a new technique?  I’d love to hear about it, or better yet see it!  You can post a photo of a finished project using a new technique that you learned on the zween facebook page, or just tell me the story of a project in the comments below.

7 Comments

Filed under Just For Fun, Pattern

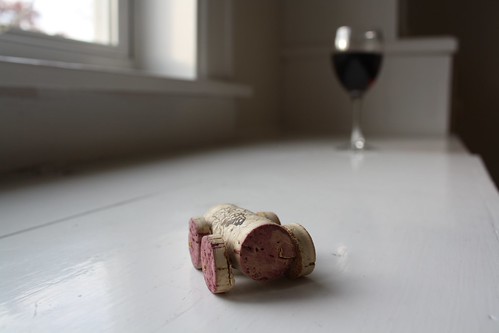
Wine Cork Car

Sometimes I get in a making rut.  I find that this usually happens when I want to get lots of stuff “done.”

Being goal oriented is important to be sure, but usually the best ideas come out of just playing around.  I’m not saying that making a car out of wine corks is the best idea that I’ve ever had.  That’s not the point.

The point is to exercise my mind and hands by creating something new.  Maybe it will fail, maybe it wont.

What you see here is another way for me to “sketch” out ideas.  Just as not all thinking needs to be done exclusively in the brain; not all sketching needs to be done on paper.

For those of you who are wondering, yes this car actually does roll!

Remember folks; drink and craft responsibly.

*This post has just been linked to Upcycled Awesome #68 over on The T-Shirt Diaries.

Leave a comment

Filed under Just For Fun

Freecycle™

Recycling is so yesterday, today lets start Freecycling!

Recycling is great, but in reality it’s not ideal. Many of the products that we consume (plastic bags, cardboard, paper, plastic jugs, etc.) are not able to be recycled in the sense that we think that they can.

You may have heard this before, but when you recycle that 16 once pop bottle it does not become a new 16 once pop bottle. Instead it’s downcycled into something else (a park bench perhaps). The quality is poorer and the integrity of the plastic has been compromised, so new materials and chemicals are added to the mix to subsidize the new plastic material.

This isn’t to say that you shouldn’t recycle these “consumables.” In fact, most items that are able to be recycled at this time still make their way to the landfill.  So please, recycle away!

But what about all that other stuff we have?  You know, clothing, electronics, furniture, books, out-dated media, etc.  What should we do with that stuff???  Yard sales are a good option (in summer).  You could also list items on Ebay or Craigslist.  And donating to thrift stores and charities are curtainly a good option too.  But there is something else you could do with that stuff and it’s called Freecycling.

What is Freecycling?

The Freecycle Network™ is made up of 4,985 groups with 8,777,806 members around the world. It’s a grassroots and entirely nonprofit movement of people who are giving (and getting) stuff for free in their own towns. It’s all about reuse and keeping good stuff out of landfills.  Whether you’re looking to discard or acquire and item, you can turn to FREECYCLE™  to do so.  All items are 100% free.

I first heard about this great resource this summer from the owner of Green Smart Gifts where I have some of my recycled-based work on consignment.

Here’s how Freecycling works:

First, go visit the The Freecycle Network™ site to find a Freecycle™ group in your local community and sign up to become a member (it’s free!).

After you become a member, you will have access to see listings for things that people are requesting and offering.  You will be able to make your own listings as well.  For instance, you might see a listing that says, “Wanted; size 8 girls clothing, in Lakewood.”  So, if you happen to have some size 8 girls clothing that you don’t need, you can let that person know, via email.

Now lets say you’re doing some spring cleaning and discovered that you have a bunch of old magazines that you weren’t going to look at again.  You would make a listing that would say something like, “Offer; assorted travel magazines, in Lakewood.”  When someone from the group wants what you have listed they will contact you via email.

Once the two parties have contacted each other via email they will arrange a date and time to pick up the items.  Usually the person with the item will leave said item in a box or plastic bag on their porch for the other person to pick up between designated hours.

Now tell everyone you know about Freecycle™ because the more people who participate and the larger the community grows, the better it will become!

Of course there is a bit of etiquette involved.  For instance, no shows (people who say they will pick up at a curtain time then don’t show up) can be kicked out of the group, as well as people who SPAM.  Also, and this almost goes without saying, you need to be very safe and careful about who you give your address or phone number to.

But really, it’s a great way to circulate unwanted but still usable items and materials in your community.

Freecycling is the perfect source for finding the kinds of materials I work with.  I recently requested old greeting cards for making my origami gift boxes and got three responses!  I also saw an offer for some old cassette and VHS tapes that I’m really excited about working with.  I’d like to make the plastic cassette tape casings into mini note books and crochet the tape itself into different things.

I thought the whole idea of crocheting a butterfly out of tape would be an ironic and interesting idea.  You know, because of the whole transformative nature of the process.

I hope that you have found this post about Freecycle™ informative and that you will consider using it as a resource in the near future.

Thank you for stopping by.  Happy Freecycling!

This post was just added to a link party at Skip to my Lou and Upcycled Awesome over on The T-Shirt Diaries. Check out some more awesomely upcycled projects here.

11 Comments

Filed under Just For Fun

waste not gift box

You may remember the fabric collages (created using recycled fabrics) I started making last spring and how I decided to reproduce them as greeting cards.  This is a great option for those of you who produce 2D or even 3D work that is time-consuming because it is a way to make multiples of your work that are quick and affordable to both you and your customers.

In my case, I used a flat-bed scanner to import my collages into a digital format, but you could easily just photograph your pieces instead (especially when dealing with work that is more 3D in nature.)  What I really enjoy about my scans however, is the detail of the fabric textures that I was able to retain.

Making the collages; fun.
Importing them into Adobe Illustrator and formatting them into cards; tedious.
Getting them printed; a chore.

Usually.  It’s really getting better though.  One of these days we’ll get it right.

I say that because every time I’ve gotten them printed something goes wrong and several pages come out that are unusable (as cards).  Now I’ve never had to pay for these misprints, which I am very thankful for, but at the same time I feel bad because I really don’t like to be wasteful.  And though an unknown percentage of the paper used in my cards is recycled, they are overall my least eco-friendly product that I carry in my line.  (Though I have sourced a local print shop which I love, so as to make it more “green” in terms of transportation to and from the printer since I ride my bike, plus it helps support another local business).

The issue with this last print run was that it wasn’t printed on the correct weight paper.  Luckily it was a very small run (only about 12 letter sized sheets of paper worth).  I didn’t even realize the mistake until I was home and about to fold them into the cards.  I felt really bad because this was really my fault that I hadn’t reminded the printer to use his heaviest weight paper.  Now we’ve devised a system so that hopefully these types of misprints wont happen in the future.

But in the mean time I had about 24 cards worth of cover stock paper printed with my card imagery that I wasn’t able to make cards with (plus a bunch more from other runs).  Sure I could have just thrown them in the recycling or used the backs for something else, but that’s not really my style.

So I decided to make origami gift boxes with them instead.  In the past I have made these out of junk mail and have put bows on them, but I like these particular boxes bow-less better.

AND they are the perfect size for my little fabric scrap flower brooches too!

Do you have a story about how you turned a mistake into something usable?  I’d love to hear it!  Please leave me a comment below!

Leave a comment

Filed under Just For Fun

Stashbusting Project #1; learning tunisian crochet

Have you heard?  It’s Stashbusting September!

What is Stashbusting you ask?  Stashbusting is taking all those great materials you have stuffed in every nuck and cranny of your home that have accumulated over the year (or several) and finally do something with them.

I found out about Stashbusting September over on The T-Shirt Diaries and took the Stashpbusting pledge to:

  • Craft for personal use only with items I have on hand and not buy new craft supplies (even from Goodwill or garage sales).
  • Think of unique and creative ways to use items I was thinking of throwing out.
  • Think outside of the box.
  • Try to make at least one upcycled craft item this month.
  • Proudly post the Stashbusting September button on my website so everyone knows I am busting some stash (see button on right side bar).
  • Check back to The T-Shirt Diaries to find other blogs that are busting some stash.

For my first Stashbusting September project I decided to use up some yarn and learn a new technique called Tunisian crochet. 

Though Stashbusting is mainly about using up all those materials that have mysteriously multiplied and are taking over your life, I think it can also be about using tools that you’ve accumulated but haven’t really had the chance to use and discover their potential.  For me, one of those tools was my Tunisian crochet hook.

IMG_7779

I found this Tunisian crochet hook at a second-hand store earlier this summer and shortly afterword picked up a Tunisian crochet book from the library by Sheryl Thies called Get Hooked On Tunisian Crochet; Learn How With 13 Projects.

The tutorial at the beginning of the book was very easy to follow and has very clear illustrations.  Personally, I find that I learn crochet and knitting techniques very well from books like these.

The first thing I made yesterday was a very small swatch of the Tunisian Simple Stitch (Tss), using the size G hook I recently found and some left over Soft Pink from Carron’s Simply Soft line.  You might recognize this yarn from several of my past projects including my granny square blanket (with tutorial for making granny squares) and Mary Jane slippers, a plastic canvas heart pin for Valentine’s Day, little hen egg cozies for Easter, and even some of my crochet flower hair clips.

Tunisian crochet produces a fairly dense stitch, which has its applications, but I was interested in achieving something with a bit more drape.  That would mean I either needed a finer yarn, or, a larger hook.  Luckily, I had a very chunky, wooden size 15 hook stashed away that I bought several years ago at another thrift store (hooks and needles can be expensive since you need so many different sizes, so I love finding them second-hand.  Plus, they’re usually of a higher quality than what is made today).

I don’t believe my size 15 hook was meant to be used for Tunisian crochet, as it lacks the knitting-needle-like stopper on the end.  However, since it doesn’t have a thumb grip, I didn’t see why it wouldn’t work, as long as I didn’t make too many stitches.

The result of using my big hook with this particular yarn is a bit mixed.  I really like the drape that is achieved, however, I’m a little disappointed in the sloppiness of the side seems.  Sloppiness was not an issue with my first swatch, probably because the gauge was a closer match to what is recommended for the yarn (size H).

It’s not perfect, but I think I’m going to continue with this piece and make it into a child-size scarf.  Stashbusting is all about the process of using up some of this extra “stuff” we have so that ultimately we can accumulate more and make more.  I know, it’s a vicious cycle.

Thank you for visiting zween!  If you are officially participating in Stashbusting September, I’d love to hear from you and see what you’re doing.  If you’re not, that’s okay, I hope that this post has inspired you to get through some of that extra yarn, fabric, beads, etc.

To keep up on all things zween, please like my facebook page.  Thanks!

2 Comments

Filed under Just For Fun

Stash Busting September

stashbustingsam
Do you have a big stash of art/craft supplies?  It’s time to get them out and start using them!

Stash Busting September was created The T-Shirt Diaries and Pinkapotamus to give us makers motivation to start really getting into our supplies and de-stashing them.  Oh man do I have big plans for this challenge!

For all of the guide lines about this challenge make sure to check out this post and link your blog to it so that you too can participate, but in the mean time I’ll give you an overview of what Stash Busting September is all about.

By participating in this challenge I pledge to not buy any art/craft supplies in the month of September for personal use, (please note that by participating in this challenge one is not obligated to sustain from buying supplies for business purposes) and will instead use only supplies that I already have on hand.  This includes items from thrift stores and yard sales.

The T-Shirt Diaries is all about upcycling, which is right up my ally.  As an added challenge, I’m going to also participate in the Stash Busting Contest, which involves making an upcycled craft from my stash.

So now that you know about Stash Busting September what are you waiting for?  Sign up!  You have until September 3rd to link up to Stash Busting September, but why wait?  I know you like a challenge so get going!

Leave a comment

Filed under Just For Fun